From xkcd. This is cute, but I fear it might be more true than I’m willing to admit.
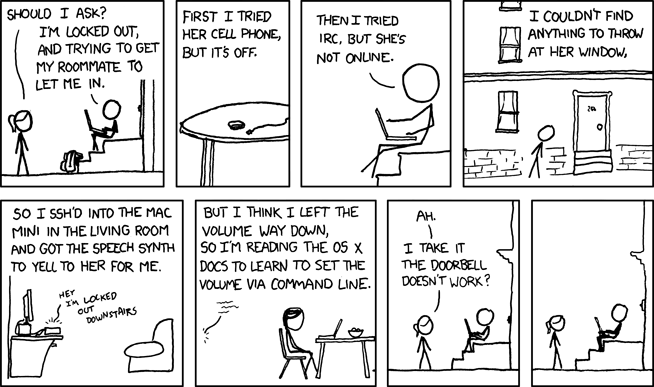
From xkcd. This is cute, but I fear it might be more true than I’m willing to admit.

I’ve been following the recent development of the new “Netbook” laptop category. It was started with ASUS and their EeePC but there have been many other entries by Dell, Acer, and others. Two of my colleagues at work got the Acer and like them and my brief look at a selection at Circuit City has sold me on the concept. A modestly-powered system (1.6 GHz CPU and 512M to 1G RAM) with a small screen (7-10″) but in a small and affordable package makes a very attractive option for things like web browsing and email.
I am quite hopeful Apple releases one at Macworld Expo next week, but I’m not holding my breath. While I think they would clean up with a $400-500 “MacBook Mini” I can’t help but think they are scared of what that might do to their bottom line.
I’m a big fan of MythBusters and have come to always enjoy the antics of its hosts Jamie Hyneman and Adam Savage. They are both very talented and quite entertaining. Adam seems especially built for it given his creativity and funloving attitude. If you’ve watched the show, you understand. What you may not understand, however, is his dark side. The obsessive and compulsive side. Watch the below presentation to see what he went through for a recent project. I can’t decide if I need to feel sorry for his family or learn his time management skills.
A friend at work that knows that I have a Mac-based home theater, offered an invite to the in-development software/service, Boxee. It is a very well-designed piece of software currently for OS X and Linux that presents not only your own library of music, videos, and pictures, but also can present web services like Hulu, YouTube, Flickr, Last.fm, and others. Hopefully, it’ll add support for EyeTV so I can watch recorded shows in the same interface.
quick intro to boxee from boxee on Vimeo.
While it is considered alpha, the amount of function and polish is quite significant. There’s social aspects like seeing the things your friends have listened to or watched. The service is invite only currently, so if you’re interested, please let me know.
 Over the summer I purchased a Drobo “storage robot” from Data Robotics for my home server/media center. It is a four-bay USB storage device that accepts any number and combination of SATA drives to build a larger virtual volume which can be used on either OS X or Windows. I intended to write about my experiences (receiving it the day before they upgraded the product, a bad first unit, some early driver bugs, etc.) but never got around to it.
In spite of some of my earliest experiences I am quite a fan of the device and have not regretted the purchase (only the timing). It is a flexible and well-performing method for keeping my pile of data safe with plenty of elbow room.
Why am I selling it you ask? The truth is, I’m not a typical user. The system it is attached to serves numerous roles. It is the server for our peay.us domain (web, mail, DNS, etc.) and also the home media server (iTunes, iPhoto, file server, and El Gato EyeTV DVR). The end result of all of this disk I/O is that when EyeTV is recording a show from the USB TV tuner and writing to the USB storage while other disk activity is going on (home directory syncing or Time Machine backup), it will often skip frames. That makes for a very annoying viewing experience. If the disk is idle and just recording there isn’t a problem and recent firmware updates for the device have helped considerably, but the fact remains I’m expecting server storage performance from a device that was not really designed or intended for such use.
As a result, I decided to purchase a gen 2 Drobo which adds a FireWire interface. Having a dedicated bus for storage will alleviate the problems I’ve been experiencing. Of course, if I had just waited a week before purchasing the original unit, I wouldn’t have had to do this.
To keep our budget in check, I am selling the original one to recoup some of the cost of upgrading it. That means you get to benefit from my bad timing. If you are interested in purchasing it (you’ll have to supply one or more of your own drives), make me an offer. I’d prefer to keep it among my “friends” and family to avoid hassling with eBay or craigslist but am motivated and will sell it one way or another.
 I’ve been learning a lot about the Time Machine feature of Apple’s OS X 10.5 (Leopard) and wanted to take the time to share my experience. In a nutshell, Time Machine watches the files that get modified on your system and copies them to a secondary hard drive or network volume so that you have automatic backups available for anything that was deleted or modified.
It is a very nice user experience and it takes a lot of the work out of making backups. Of course, by taking work out Apple is really just making decisions for the majority of users and for most users, that decision is quite acceptable. I’m not most users. Fortunately, Apple directly or indirectly provides methods for changing the behavior of much of the OS and Time Machine is no exception. Here are many of the things that I’ve gathered over the last few months that might benefit you if you want to get more out of your experience.
Overview
 I won’t go into too much detail as I’m going to presume you’ve already used Time Machine and are familiar with how it works. Generally, it performs a backup of your system every hour to an external drive. It is efficient in that only the modified files are copied. Hourly copies are kept for for 24 hours, daily copies for a month, and weekly copies until the destination drive fills up. You are free to put other data on that Time Machine disk, but it will eventually consume all available space.
Space is pretty efficiently used in that a file is copied only if it has changed but ineffecient in that a small change to a large file results in the entire file being backed up again. This can be a problem if the file really is big and changes frequently. This is the case with the virtual hard disk used for a virtual machine under VMware Fusion or Parallels Desktop.
Backing-up to a network volume
Any self-respecting geek has more than one computer in his or her home. Often times, you are using a laptop and have a dedicated computer with more storage sitting by your TV or in the den, closet, or garage. Unfortunately, while Time Machine can back up to a network volume, by default it only supports a specially presented volume served via Apple’s network filling protocol (AFP) from Leopard Server. You can back up to other choices (e.g., Windows or Linux) via Microsoft’s filing protocol (CIFS). To do this, you first need to have a native Apple file system to copy the data to.
Creating a sparseimage
OS X has supported disk images since the beginning but has recently added a format called sparseimage that starts small but grows as more data is added to it. To use a network volume, you first need to create the image that your machine will be storing the actual data in. Type the following on a mac creating the disk on a local hard drive first:
hdiutil create -library SPUD -size $SIZESPEC -fs HFS+J -type SPARSEBUNDLE \

-tgtimagekey sparse-band-size=262144 -volname "Backup of $MACHINENAME" \

$MACHINENAME_$MAC.sparsebundle
Here are explanations on the options that you’ll want to change:
$SIZESPEC – the size of the virtual disk when filled. A good choice is twice the size of what you’re backing up.
$MACHINENAME – The name of your machine
$MAC – The network address of the primary network interface without separators (e.g., aabbccddeeff0011). You can get this from System Profiler or Network Utility.
For education purposes, here is some explanation of some of the other items:
-fs HFS+J – make the filesystem HFS+ with Journaling (the default OS X filesystem)
sparse-band-size – the size of the ‘chunks’ that make up the sparseimage (they aren’t just one single file). Normally, the images are made in 8M chunks but those perform quite poorly over the network. The value provided above represents 128M chunks (2 * 128 * 1024 512-Byte-Blocks = 262144 = 128MB) which is a good size for a hard disk backup.
Copying the image to to the network volume is as simple as dragging the sparseimage file via the Finder or do it in the terminal:
cp -r $MACHINENAME_$MAC.sparsebundle /Volumes/path/to/destination
The last part is to tell the system to allow any network volume as a destination and not just AFP:
defaults write com.apple.systempreferences TMShowUnsupportedNetworkVolumes 1
Using just part of a drive
For some reasons you’ll see below, I wanted to limit the usage of the destination drive local to the system. Normally, Time Machine will use all the space of an external drive chosen as the destination. If you are storing other information on it, that can become a problem. The solution is to convert the physical Time Machine destination volume into a disk image.
The first step is to create a disk image with the same information above. Next, mount the newly created disk image:
hdiutil mount /path/to/created/imagefile
You can also mount it simply by double-clicking on the disk image file. You’ll then copy the contents of the current Time Machine volume to the created disk image. Note, it is best to ensure Time Machine is disabled as you don’t want anything changing as you are copying it:
sudo asr restore --source /Volumes/srcvol --target /Volumes/Backup\ of\ $MACHINENAME
asr is Apple’s System Restore utility and it performs copy between volumes but ensures that everything is copied properly. You need the sudo portion to have the command be able to access every file which may not be the case if run just as yourself.
Of course, this copy can take some time depending on the speed of your system but mostly due to the size of the data being copied.
Once completed, you can unmount the disk image and configure Time Machine to use the disk that the disk image is stored on. Time Machine is smart enough to use the image if it sees it (the file has to be at the top-level of the destination hard drive).
Trigger a Time Machine backup from the command-line
If you ever want to trigger a Time Machine backup on a system from the command-line, perhaps on a remote system via ssh, issue the following command:
/System/Library/CoreServices/backupd.bundle/Contents/Resources/backupd-helper -auto
Exclude an individual file from being backed up
You can exclude files from being backed up (like previously mentioned virtual disks) using the GUI in the Time Machine preferences (under Options), but it can also be done using the extended attributes in the command-line:
xattr -w com.apple.metadata com_apple_backup_excludeItem /path/to/file/to/exclude
Similarly, you can see if a file is being excluded but listing the extended attributes:
xattr -l /path/to/file/in/question
Hide the Time Machine disk in the Finder
If you aren’t getting all fancy and writting to a disk image, you may want to hide the destiation disk. You can do that just by making the volume invisible:
SetFile -a V /path/to/Time/Machine/Volume
Conclusion
I hope this has been helpful to you and that with the information are able to make a useful tool even more useful. To give credit where credit is due, I’ve included below the links to where much of the information was originally found.
Update
20090527 I’ve revised the sparse-band-size value from 1G to 128M which is the largest band currently support in 10.5.7. Files with larger band files cannot be mounted in 10.5.7. Once I determine the correct procedure for converting an old image, I’ll post a new article. In the meantime, you can get more information here.
Reference
10.5: Set up Time Machine on a NAS in three easy steps
10.5: Improve networked Time Machine performance
After about 8 months and several notarized letters, I finally received the settlement on the insurance claim for my pond-enabled iPhone. $249 which is the cost of getting it repaired. I figured that would be the amount and wasn’t holding much hope for a complete reimbursement of purchase cost. I had long replaced the phone and now that it’s all settled, I’m free to pursue my options.
Repairing the phone is kinda silly as I would be lucky to get $250 selling it. Becky doesn’t want it and there’s no way I’m letting the kids have it. That leaves me with the “parts” option. There are a few websites that sell parts for iPods and iPhones can since the outside is pristine, I could probably get at least a little bit for it.
Since you can’t kill a dead patient, I will be cutting into the Davey Jones phone and see if I can restore more (full?) functioning. Remember, it did work as a shuffle for a while (it’s been completely dead for the last 2-3 months) so there’s a chance I can have some luck if I do a little refurbishment.
I’ll let you know the status of the cadaver in a follow-up.
Part of this weekend’s 8th birthday festivities for my son Brian included a “friend party” on Friday. We took him, and five of his friends (all boys, unsurprisingly) to go see Speed Racer and then go for pizza afterwards. In short, the movie was a blast and the boys were a handful.
Disclosure: I am a Speed Racer fan. In fact, one of my earliest memories is seeing part of an episode when I lived in Chicago (about 2.5-3 years old). I have also wanted a Mach 5 since before I could drive.
Having disclosed that, I think that is why I liked it. I had heard and it is quite obvious that the Wachowski brothers also love Speed Racer. They produced a live action movie that has all the styling and impact of the animated series. The story is thin but any more “meat” would have felt strange. Emile Hirsch did a nice job as Speed and the rest of the characters were well cast (it doesn’t hurt that I like Christina Ricci).
I may have to go see it again when it hits our budget theater and will most definitely pick it up when it is released on Blu-ray probably around Christmas.
Over at Geeks.com, they’ve written up a pretty good overview of the format wars both past and present. If you’re not up on what the whole thing was about (beside money), give it a read.
Update: Part 2, Blue Laser Boogaloo is now available
Update 2: Part 3, The War of the Discs One Format to Rule Them All (the final) is available
Celemony Software is a developer for audio tools and they have produced a product that I, frankly, thought wasn’t possible. If you’ve ever worked with audio or sound programs, you know the complexity of a sound wave. Sure, you can play games with it so much to affect pitch, tempo, or even compression ratio, but there was only so much that you could do. With their Direct Note Access, you are now able to manipulate the individual notes of a polyphonic track. Below is a YouTube version of their demo video or you can see a higher quality copy on their site along with other information.
I’ll have to share this info with the audio guys at work but I imagine they’ve already heard about it.